Mensuel Shaarli
April, 2018
Tout le monde devrait connaître les inconvénients
Le réseau libre et décentralisé qui monte

Je cherche tout le temps de la musique en libre diffusion pour mes vidéos

Très technique, et je crois que je vais en avoir bientôt besoin
Pour ceux qui veulent installer un serveur dédié à pas cher chez soi
Marrant à tester pour ceux qui ont des serveurs
Outil qu'il est bon d'avoir dans sa besace

L'Etat Français travaille pour Google maintenant (et il semble persévérer)
Un outil très pratique en ligne de commande, à se souvenir

Les GAFAM (Google, Apple, Facebook, Amazon, Microsoft) nous font payer leurs services avec nos Libertés
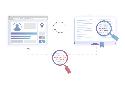
Nouvel article sur la gestion de ses mots de passe sur internet
Un outil important à maîtriser pour sécuriser son utilisation d'Internet

Information inquiétante


Un nouveau service frama, compter ses visites sans fliquer

Il faut vraiment se poser la question du partage des richesses et du revenu universel
Très technique, mais parfois très utile
WorldEdit Tutorial
This is a step-by-step tutorial outlining the basic usage of WorldEdit. For more information, see the README.
Let's start with a few assumptions:
- You have a compatible version of Minetest working.
- See the README for compatibility information.
- You have WorldEdit installed as a mod.
- You are familiar with the basics of the game.
- How to walk, jump, and climb.
- How to dig, place, and punch blocks.
- One of the following:
- How to type into the chat and read text from it.
- How to open the inventory screen and press buttons on it.
Overview
WorldEdit has a "region", which is simply a cuboid area defined by two markers, both of which the player can move around. Every player can have their own region with their own two markers.
WorldEdit GUI buttons and chat commands generally work inside the region selected, or around the first marker.
If you are using the chat commands, follow the steps under Chat Commands. If you are using the WorldEdit GUI, follow the steps under WorldEdit GUI.
Step 1: Selecting a region
Chat Commands
In the chat prompt, enter //p set. In the chat, you are prompted to punch two nodes to set the positions of the two markers.
Punch a nearby node. Be careful of breakable ones such as torches. A black cube reading "1" will appear around the node. This is the marker for WorldEdit position 1.
Walk away from the node you just punched. Now, punch another node. A black cube reading "2" will appear around the node. This is the marker for WorldEdit position 2.
WorldEdit GUI
Open the main WorldEdit GUI from your inventory screen. The icon looks like a globe with a red dot in the center.
Press the "Get/Set Positions" button. On the new screen, press the "Set Position 1" button. The inventory screen should close.
Punch a nearby node. Be careful of breakable ones such as torches. A black cube reading "1" will appear around the node. This is the marker for WorldEdit position 1.
Walk away from the node you just punched. Open your inventory again. It should be on the same page as it was before.
Press the "Set Position 2" button. The inventory screen should close.
Now, punch another node. A black cube reading "2" will appear around the node. This is the marker for WorldEdit position 2.
Step 2: Region commands
Chat Commands
In the chat prompt, enter //set mese. In the chat, you will see a message showing the number of nodes set after a small delay.
Look at the place between the two markers: it is now filled with MESE blocks!
The //set <node> command fills the region with whatever node you want. It is a region-oriented command, which means it works inside the WorldEdit region only.
Now, try a few different variations, such as //set torch, //set cobble, and //set water.
WorldEdit GUI
Open the main WorldEdit GUI from your inventory screen.
Press the "Set Nodes" button. You should see a new screen with various options for setting nodes.
Enter "mese" in the "Name" field. Press Search if you would like to see what the node you just entered looks like.
Press the "Set Nodes" button on this screen. In the chat, you will see a message showing the number of nodes set after a small delay.
Look at the place between the two markers: it is now filled with MESE blocks!
The "Set Nodes" function fills the region with whatever node you want. It is a region-oriented command, which means it works inside the WorldEdit region only.
Now, try a few different variations on the node name, such as "torch", "cobble", and "water".
Step 3: Position commands
Chat Commands
In the chat prompt, enter //hollowdome 30 glass. In the chat, you will see a message showing the number of nodes set after a small delay.
Look around marker 1: it is now surrounded by a hollow glass dome!
The //hollowdome <radius> <node> command creates a hollow dome centered around marker 1, made of any node you want. It is a position-oriented command, which means it works around marker 1 and can go outside the WorldEdit region.
WorldEdit GUI
Open the main WorldEdit GUI from your inventory screen.
Press the "Sphere/Dome" button. You should see a new screen with various options for making spheres or domes.
Enter "glass" in the "Name" field. Press Search if you would like to see what the node you just entered looks like.
Enter "30" in the "Radius" field.
Press the "Hollow Dome" button on this screen. In the chat, you will see a message showing the number of nodes added after a small delay.
Look around marker 1: it is now surrounded by a hollow glass dome!
The "Hollow Dome" function creates a hollow dome centered around marker 1, made of any node you want. It is a position-oriented command, which means it works around marker 1 and can go outside the WorldEdit region.
Step 4: Other commands
Chat Commands
There are many more commands than what is shown here. See the Chat Commands Reference for a detailed list of them, along with descriptions and examples for every single one.
If you're in-game and forgot how a command works, just use the /help <command name> command, without the first forward slash. For example, to see some information about the //set <node> command mentioned earlier, simply use /help /set.
A very useful command to check out is the //save <schematic> command, which can save everything inside the WorldEdit region to a file, stored on the computer hosting the server (the player's computer, in single player mode). You can then later use //load <schematic> to load the data in a file into a world, even another world on another computer.
WorldEdit GUI
This only scratches the surface of what WorldEdit is capable of. Most of the functions in the WorldEdit GUI correspond to chat commands, and so the Chat Commands Reference may be useful if you get stuck.
It is helpful to explore the various buttons in the interface and check out what they do. Learning the chat command interface is also useful if you use WorldEdit intensively - an experienced chat command user can usually work faster than an experienced WorldEdit GUI user.
Chat Commands
For more information, see the README.
Many commands also have shorter names that can be typed faster. For example, if we wanted to use //move ? 5, we could instead type //m ? 5. All shortened names are listed below:
| Short Name | Original Name |
|---|---|
//i |
//inspect |
//rst |
//reset |
//mk |
//mark |
//umk |
//unmark |
//1 |
//pos1 |
//2 |
//pos2 |
//fp |
//fixedpos |
//v |
//volume |
//s |
//set |
//r |
//replace |
//ri |
//replaceinverse |
//hspr |
//hollowsphere |
//spr |
//sphere |
//hdo |
//hollowdome |
//do |
//dome |
//hcyl |
//hollowcylinder |
//cyl |
//cylinder |
//hpyr |
//hollowpyramid |
//pyr |
//pyramid |
//about
Get information about the mod.
//about//inspect on/off/1/0/true/false/yes/no/enable/disable/<blank>
Enable or disable node inspection.
//inspect on
//inspect off
//inspect 1
//inspect 0
//inspect true
//inspect false
//inspect yes
//inspect no
//inspect enable
//inspect disable
//inspect
//reset
Reset the region so that it is empty.
//reset//mark
Show markers at the region positions.
//mark//unmark
Hide markers if currently shown.
//unmark//pos1
Set WorldEdit region position 1 to the player's location.
//pos1//pos2
Set WorldEdit region position 2 to the player's location.
//pos2//p set/set1/set2/get
Set WorldEdit region, WorldEdit position 1, or WorldEdit position 2 by punching nodes, or display the current WorldEdit region.
//p set
//p set1
//p set2
//p get
//fixedpos set1 x y z
Set a WorldEdit region position to the position at (<x>, <y>, <z>).
//fixedpos set1 0  0 0
//fixedpos set1 -30 5 28
//fixedpos set2 1004 -200 432
//volume
Display the volume of the current WorldEdit region.
//volume//deleteblocks
Delete the MapBlocks (16x16x16 units) that contain the selected region. This means that mapgen will be invoked for that area. As only whole MapBlocks get removed, the deleted area is usually larger than the selected one. Also, mapgen can trigger mechanisms like mud reflow or cavegen, which affects nodes (up to 112 nodes away) outside the MapBlock, so dont use this near buildings. Note that active entities are not part of a MapBlock and do not get deleted.
//deleteblocks//set <node>
Set the current WorldEdit region to <node>.
//set air
//set cactus
//set Blue Lightstone
//set dirt with grass
//mix <node1> ...
Fill the current WorldEdit region with a random mix of <node1>, ....
//mix air
//mix cactus stone glass sandstone
//mix Bronze
//mix default:cobble air
//replace <search node> <replace node>
Replace all instances of <search node> with <replace node> in the current WorldEdit region.
//replace Cobblestone air
//replace lightstone_blue glass
//replace dirt Bronze Block
//replace mesecons:wire_00000000_off flowers:flower_tulip
//replaceinverse <search node> <replace node>
Replace all nodes other than <search node> with <replace node> in the current WorldEdit region.
//replaceinverse Cobblestone air
//replaceinverse flowers:flower_waterlily glass
//replaceinverse dirt Bronze Block
//replaceinverse mesecons:wire_00000000_off flowers:flower_tulip
//hollowsphere <radius> <node>
Add hollow sphere centered at WorldEdit position 1 with radius <radius>, composed of <node>.
//hollowsphere 5 Diamond Block
//hollowsphere 12 glass
//hollowsphere 17 mesecons:wire_00000000_off
//sphere <radius> <node>
Add sphere centered at WorldEdit position 1 with radius <radius>, composed of <node>.
//sphere 5 Diamond Block
//sphere 12 glass
//sphere 17 mesecons:wire_00000000_off
//hollowdome <radius> <node>
Add hollow dome centered at WorldEdit position 1 with radius <radius>, composed of <node>.
//hollowdome 5 Diamond Block
//hollowdome -12 glass
//hollowdome 17 mesecons:wire_00000000_off
//dome <radius> <node>
Add dome centered at WorldEdit position 1 with radius <radius>, composed of <node>.
//dome 5 Diamond Block
//dome -12 glass
//dome 17 mesecons:wire_00000000_off
//hollowcylinder x/y/z/? <length> <radius> <node>
Add hollow cylinder at WorldEdit position 1 along the x/y/z/? axis with length <length> and radius <radius>, composed of <node>.
//hollowcylinder x +5 8 Bronze Block
//hollowcylinder y 28 10 glass
//hollowcylinder z -12 3 mesecons:wire_00000000_off
//hollowcylinder ? 2 4 default:stone
//cylinder x/y/z/? <length> <radius> <node>
Add cylinder at WorldEdit position 1 along the x/y/z/? axis with length <length> and radius <radius>, composed of <node>.
//cylinder x +5 8 Bronze Block
//cylinder y 28 10 glass
//cylinder z -12 3 mesecons:wire_00000000_off
//cylinder ? 2 4 default:stone
//hollowpyramid x/y/z? <height> <node>
Add hollow pyramid centered at WorldEdit position 1 along the x/y/z/? axis with height <height>, composed of <node>.
//hollowpyramid x 8 Diamond Block
//hollowpyramid y -5 glass
//hollowpyramid z 2 mesecons:wire_00000000_off
//hollowpyramid ? 12 mesecons:wire_00000000_off
//pyramid x/y/z? <height> <node>
Add pyramid centered at WorldEdit position 1 along the x/y/z/? axis with height <height>, composed of <node>.
//pyramid x 8 Diamond Block
//pyramid y -5 glass
//pyramid z 2 mesecons:wire_00000000_off
//pyramid ? 12 mesecons:wire_00000000_off
//spiral <length> <height> <spacer> <node>
Add spiral centered at WorldEdit position 1 with side length <length>, height <height>, space between walls <spacer>, composed of <node>.
//spiral 20 5 3 Diamond Block
//spiral 5 2 1 glass
//spiral 7 1 5 mesecons:wire_00000000_off
//copy x/y/z/? <amount>
Copy the current WorldEdit region along the x/y/z/? axis by <amount> nodes.
//copy x 15
//copy y -7
//copy z +4
//copy ? 8
//move x/y/z/? <amount>
Move the current WorldEdit positions and region along the x/y/z/? axis by <amount> nodes.
//move x 15
//move y -7
//move z +4
//move ? -1
//stack x/y/z/? <count>
Stack the current WorldEdit region along the x/y/z/? axis <count> times.
//stack x 3
//stack y -1
//stack z +5
//stack ? 12
//stack2 <count> <x> <y> <z>
Stack the current WorldEdit region <count> times by offset <x>, <y>, <z>.
//stack2 5 3 8 2
//stack2 1 -1 -1 -1
//scale <factor>
Scale the current WorldEdit positions and region by a factor of positive integer <factor> with position 1 as the origin.
//scale 2
//scale 1
//scale 10
//transpose x/y/z/? x/y/z/?
Transpose the current WorldEdit positions and region along the x/y/z/? and x/y/z/? axes.
//transpose x y
//transpose x z
//transpose y z
//transpose ? y
//flip x/y/z/?
Flip the current WorldEdit region along the x/y/z/? axis.
//flip x
//flip y
//flip z
//flip ?
//rotate x/y/z/? <angle>
Rotate the current WorldEdit positions and region along the x/y/z/? axis by angle <angle> (90 degree increment).
//rotate x 90
//rotate y 180
//rotate z 270
//rotate ? -90
//orient <angle>
Rotate oriented nodes in the current WorldEdit region around the Y axis by angle <angle> (90 degree increment)
//orient 90
//orient 180
//orient 270
//orient -90
//fixlight
Fixes the lighting in the current WorldEdit region.
//fixlight//drain
Removes any fluid node within the current WorldEdit region.
//drain//hide
Hide all nodes in the current WorldEdit region non-destructively.
//hide//suppress <node>
Suppress all <node> in the current WorldEdit region non-destructively.
//suppress Diamond Block
//suppress glass
//suppress mesecons:wire_00000000_off
//highlight <node>
Highlight <node> in the current WorldEdit region by hiding everything else non-destructively.
//highlight Diamond Block
//highlight glass
//highlight mesecons:wire_00000000_off
//restore
Restores nodes hidden with WorldEdit in the current WorldEdit region.
//restore//save <file>
Save the current WorldEdit region to "(world folder)/schems/<file>.we".
//save some random filename
//save huge_base
//allocate <file>
Set the region defined by nodes from "(world folder)/schems/<file>.we" as the current WorldEdit region.
//allocate some random filename
//allocate huge_base
//load <file>
Load nodes from "(world folder)/schems/<file>.we" with position 1 of the current WorldEdit region as the origin.
//load some random filename
//load huge_base
//lua <code>
Executes <code> as a Lua chunk in the global namespace.
//lua worldedit.pos1["singleplayer"] = {x=0, y=0, z=0}
//lua worldedit.rotate(worldedit.pos1["singleplayer"], worldedit.pos2["singleplayer"], "y", 90)
//luatransform <code>
Executes <code> as a Lua chunk in the global namespace with the variable pos available, for each node in the current WorldEdit region.
//luatransform minetest.add_node(pos, {name="default:stone"})
//luatransform if minetest.get_node(pos).name == "air" then minetest.add_node(pos, {name="default:water_source"})
//mtschemcreate <file>
Save the current WorldEdit region using the Minetest Schematic format to "(world folder)/schems/<file>.mts".
//mtschemcreate some random filename
//mtschemcreate huge_base
//mtschemplace <file>
Load nodes from "(world folder)/schems/<file>.mts" with position 1 of the current WorldEdit region as the origin.
//mtschemplace some random filename
//mtschemplace huge_base
//mtschemprob start/finish/get
After using //mtschemprob start all nodes punched will bring up a text field where a probablity can be entered.
This mode can be left with //mtschemprob finish. //mtschemprob get will display the probabilities saved for the nodes.
//mtschemprob get//clearobjects
Clears all objects within the WorldEdit region.
//clearobjects//shift x/y/z/?/up/down/left/right/front/back [+|-]<amount>
Shifts the selection area by [+|-]<amount> without touching its contents. The shifting axis can be absolute (x/y/z) or
relative (up/down/left/right/front/back).
//shift left 5//expand [+|-]x/y/z/?/up/down/left/right/front/back <amount> [reverse-amount]
Expands the selection by <amount> in the selected absolute or relative axis. If specified, the selection can be expanded in the
opposite direction over the same axis by [reverse-amount].
//expand right 7 5//contract [+|-]x/y/z/?/up/down/left/right/front/back <amount> [reverse-amount]
Contracts the selection by <amount> in the selected absolute or relative axis. If specified, the selection can be contracted in the
opposite direction over the same axis by [reverse-amount].
//expand right 7 5//outset [hv] <amount>
Expands the selection in all directions by <amount>. If specified, the selection can be expanded horizontally in the x and z axes [h]
or vertically in the y axis [v].
//outset v 5//inset [hv] <amount>
Contracts the selection in all directions by <amount>. If specified, the selection can be contracted horizontally in the x and z axes [h]
or vertically in the y axis [v].
//outset v 5Après 6 années de développement, enfin une nouvelle version

Il va falloir que je mette en place des nouveaux services
Article à garder pour un web plus libre

Voici un article que j'aurai apprécié de découvrir avant

Merci à cet organisme d'avoir améliore la sécurité du web, personnellement je m'en sers

Article instructif sur comment on est suivi numériquement en permanence

Il faut protéger le droit d'auteur, mais pas à n'importe quel prix

Il faut impérativement rester attentif aux risques
Dommage, j'ai conseillé cette messagerie à tous mes amis
Attention à la légende urbaine qui dit que les magnats du numérique interdisent les tablettes à leurs enfants


Craft Guide for Minetest
![]()

![]()
![]()
![]()
Description
Provides items that will show you how to craft any craftable or cookable item.
Features
- Provides craftable items that can be placed.
- Placed items open like a chest, but instead of containing items, it contains a list of craftable items .
- Items can be dragged into the
Outputslot, and the craft recipe will be displayed.
Project Resources
Support
- Does this README need improvement? Go ahead and suggest a change.
- Found a bug, or need help using this project? Check the open issues or create an issue.
About
This module is open source, so it's distributed freely. If you find it useful then I ask not for your wealth, but simply to spare your time to consider the world we share by watching Earthlings, a multi-award winning film available to watch online for free. A must-see for anyone who wishes to make the world a better place.
License
BSD-3-Clause, Copyright © 2013-2014 Brett O'Donnell
Items
- admin_pick: magenta pickaxe, infinite durability, mines everything including unbreakable blocks instantly. No drops. Don't put this pickaxe in the hands of a griefer, of course.
- admin_pick_with_drops: same as admin pickaxe, but drops stuff.
- infinite_fuel: fuel lasting for a (near)-infinite time. Don't worry about the "near" * it lasts for about 50 in-real-life years.
- super_apple: a yellow apple which heals 20 HP.
- copper_coin,
- silver_coin,
- gold_coin: these have nothing to do with the More Ores mod; they can be used as a currency for trading, or as an universal currency for mods that add shops.
Blocks
[!] denotes an unpointable, unbreakable block; be very careful with them, they cannot be removed by hand (they can only be removed with WorldEdit or similar).
- (block)_u : unbreakable, non-flammable, non-falling, non-decaying blocks, most common blocks have their unbreakable form (examples: maptools:stone or maptools:wood for unbreakable stone/wood). Examples: stone_u, wood_u, glass_u, …
- full_grass: unbreakable block with the grass texture on all sides.
- player_clip: [!] invisible block, not pointable.
- full_clip: invisible block, pointable. Also available as a thin face: full_clip_face.
- smoke_block: some smoke (does not harm players or entities).
- no_build: [!] very basic building prevention.
- no_interact: prevents interacting through the block (opening chests, furnaces, attacking entities, …).
- damage_(1…5): [!] damaging blocks. The damage is in half hearts and ranges from 1 to 5 (0.5 to 2.5 hearts damage every second).
- kill: [!] instant kill (deals 10 heart damage) blocks.
- light_block: [!] invisible non-solid block, prevents light from passing through.
- light_bulb: [!] invisible non-solid block, emitting a good amount of light.
Faire le bon choix est toujours difficile

Il faut confronter ses idées avec ceux qui ne pensent pas comme nous

Pour le meilleur outil libre de traitement de texte
Comment un gentil délire peut devenir un vrai projet
Quelques (nombreuses) règles utiles
Un outil que j'utilise au quotidien. À quand en France ?
Un outil pratique que j'utilise depuis quelques temps déjà

Important à connaître, même si on est par utilisateur de Facebook
Très technique, mais peut donner des idées
Article à lire avant d'aller lire la version longue
Un document numérisé n'est pas open data
Attention au article technique d'un très bon site
C'est pratique de lire ces formats depuis sont raspberry
Il faut partager les réseaux fédérés


Est ce l'outil de prise de note que je recherche ? À tester

Anticiper, c'est le maître mot
Areas mod for Minetest 0.4.8+
Configuration
If you wish to specify configuration options, such as whether players are
allowed to protect their own areas with the protect command (disabled by
default), you should check settings.lua and set the appropriate settings in your
server's configuration file (probably minetest.conf).
Tutorial
To protect an area you must first set the corner positions of the area.
In order to set the corner positions you can run:
/area_pos setand punch the two corner nodes to set them./area_pos set1/set2and punch only the first or second corner node to
set them one at a time./area_pos1/2to set one of the positions to your current position./area_pos1/2 X Y Zto set one of the positions to the specified
coordinates.
Once you have set the border positions you can protect the area by running one
of the following commands:
/set_owner <OwnerName> <AreaName>-- If you have theareasprivilege./protect <AreaName>-- If you have theareasprivilege or the server
administrator has enabled area self-protection.
The area name is used only for informational purposes (so that you know what
an area is for). It is not used for any other purpose.
For example: /set_owner SomePlayer Mese city
Now that you own an area you may want to add sub-owners to it. You can do this
with the add_owner command. Anyone with an area can use the add_owner
command on their areas. Before using the add_owner command you have to
select the corners of the sub-area as you did for set_owner. If your markers
are still around your original area and you want to grant access to your
entire area you will not have to re-set them. You can also use select_area to
place the markers at the corners of an existing area if you've reset your
markers and want to grant access to a full area.
The add_owner command expects three arguments:
- The ID number of the parent area (the area that you want to add a
sub-area to). - The name of the player that will own the sub-area.
- The name of the sub-area. (can contain spaces)
For example: /add_owner 123 BobTheBuilder Diamond lighthouse
Commands
-
/protect <AreaName>-- Protects an area for yourself. (if
self-protection is enabled) -
/set_owner <OwnerName> <AreaName>-- Protects an area for a specified
player. (requires theareasprivilege) -
/add_owner <ParentID> <OwnerName> <ChildName>-- Grants another player
control over part (or all) of an area. -
/rename_area <ID> <NewName>-- Renames an existing area. -
/list_areas-- Lists all of the areas that you own, or all areas if you
have theareasprivilege. -
/find_areas <Regex>-- Finds areas using a Lua regular expresion.
For example, to find castles:/find_areas [Cc]astle -
/remove_area <ID>-- Removes an area that you own. Any sub-areas of that
area are made sub-areas of the removed area's parent, if it exists.
If the removed area has no parent it's sub-areas will have no parent. -
/recursive_remove_areas <ID>-- Removes an area and all sub-areas of it. -
/change_owner <ID> <NewOwner>-- Change the owner of an area. -
/area_info-- Returns information about area configuration and usage. -
/select_area <ID>-- Sets the area positions to those of an existing
area. -
/area_pos {set,set1,set2,get}-- Sets the area positions by punching
nodes or shows the current area positions. -
/area_pos1 [X,Y,Z|X Y Z]-- Sets area position one to your position or
the one supplied. -
/area_pos2 [X,Y,Z|X Y Z]-- Sets area position two to your position or
the one supplied.
License
Copyright (C) 2013 ShadowNinja
Licensed under the GNU LGPL version 2.1 or later.
See LICENSE.txt and http://www.gnu.org/licenses/lgpl-2.1.txt